 |
| The himation, inside-out. |
 |
| Close up of side seam and hem. |
Now my himation is truly done, and here's a new photograph to prove it.
The difference here, of course, is that we are now looking at the himation inside-out, with the seams visible.
I've also included a close-up photograph of a part of one of the seams, to help explain how I did it.
What I did was to take the pieces I wanted to join, wrong-sides facing me, and fold each edge over, onto the wrong side of the fabric, by about 1 cm. Then I whipstitched the pieces together by putting the needle through the edge of each fold.
To "finish" each seam, I simply folded the raw edges inward, toward the stitched seam, and whip stitched the two portions of the remaining seam allowances together so that all of the raw edges were enclosed. This isn't really a flat-felled seam, though it wouldn't be hard to make it one (by sewing the joined pair of raw edges down). It has the virtue that it all can be, and was, done with my favorite stitch--whip stitch!
The hem was done, as Heather Rose Jones describes in her guide to Archaeological Sewing, with a hem finish typically found on linen garments--i.e., the raw edge was turned twice and hem stitched.
I've tried the himation on, and it fits beautifully, except that it's too short! It looks as though I'm going to have to add fabric at the hem to bring it to the correct length. I'll explain more when I post photographs showing the himation in wear.
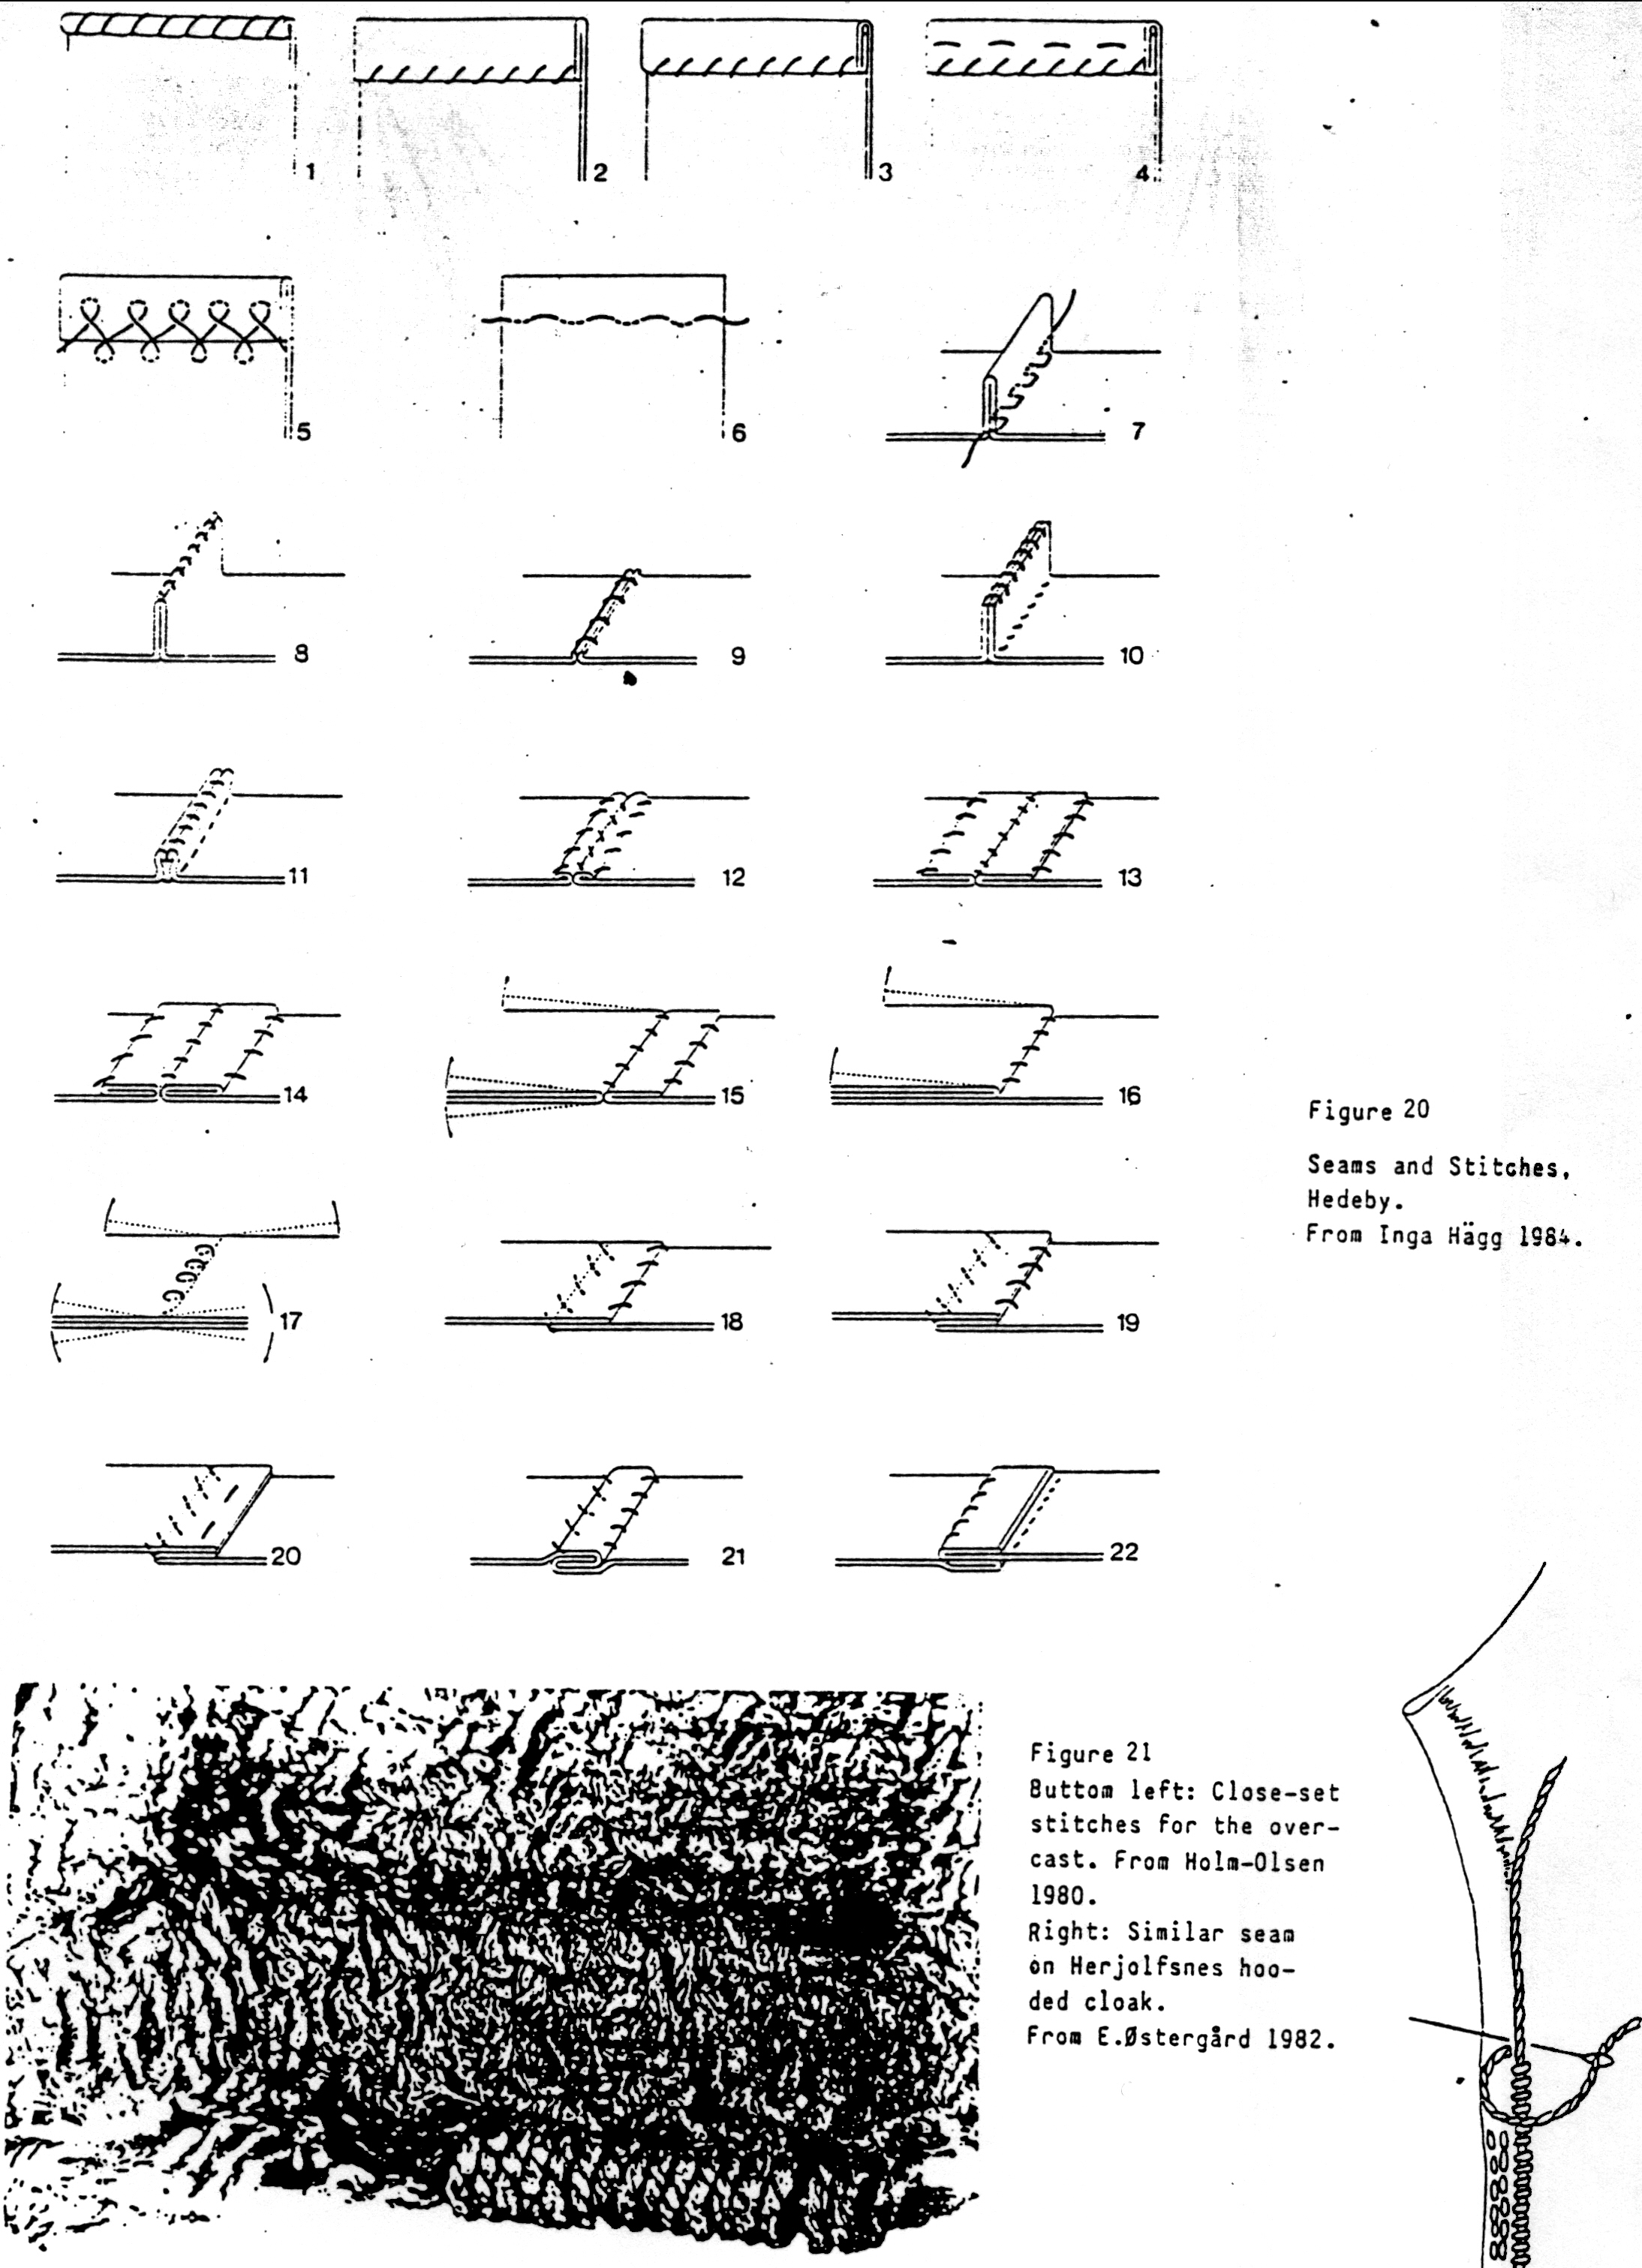
EDIT: (12/15/2013) I thought I remembered seeing a historical reference indicating that the type of seam treatment I used on the himation was used somewhere during the medieval period. I found the reference, and although it is not identical to what I did, it is similar. This chart, which I located again via Pinterest, shows stitch types that were found on fabric fragments from Hedeby. Number 10 is close to what I did, except on 10 the initial seam appears to have been sewn with running stitch. 12 appears to use a whipstitch on the folded fabric edges to create the actual seam, but the seam allowances are sewn onto the inner surface of the garment instead of to each other as I have done. Hedeby is not Byzantium, but the existence of so many different ways to make a seam with enclosed raw edges during the 10th century (contemporary with the Middle Byzantine period) suggests that my approach to the seaming of the himation was not necessarily anachronistic.
I've tried the himation on, and it fits beautifully, except that it's too short! It looks as though I'm going to have to add fabric at the hem to bring it to the correct length. I'll explain more when I post photographs showing the himation in wear.
EDIT: (12/15/2013) I thought I remembered seeing a historical reference indicating that the type of seam treatment I used on the himation was used somewhere during the medieval period. I found the reference, and although it is not identical to what I did, it is similar. This chart, which I located again via Pinterest, shows stitch types that were found on fabric fragments from Hedeby. Number 10 is close to what I did, except on 10 the initial seam appears to have been sewn with running stitch. 12 appears to use a whipstitch on the folded fabric edges to create the actual seam, but the seam allowances are sewn onto the inner surface of the garment instead of to each other as I have done. Hedeby is not Byzantium, but the existence of so many different ways to make a seam with enclosed raw edges during the 10th century (contemporary with the Middle Byzantine period) suggests that my approach to the seaming of the himation was not necessarily anachronistic.
What a pity that it is too short! At least that is an easier fix than if the upper portion did not fit.
ReplyDeleteHowever, the colour and the seam finishing are both very lovely.
Aw, shucks. Thank you.
DeleteRe: How the tunic came out. I'm inclined to believe it's all for the best. The first Historical Sew Fortnightly for 2014 is going to be "Make Do and Mend," and guess what my entry is going to be? Right--lengthening my himation! :-)
I kind of wish I had enough of the dark blue linen to make the hem extension from that. However, I now have very little of the dark blue left, while I have enough of the green to make an extension strip with very little piecing.